Selecting the appropriate sanding drum kit requires understanding grit specifications, drum diameter compatibility, and material applications. This guide provides industrial buyers and workshop professionals with a structured framework for matching sanding drum kits to specific project requirements, covering technical parameters, material compatibility, and cost-efficiency considerations. With abrasive technology advancing toward specialized coatings and precision-engineered mandrels, making informed procurement decisions directly impacts surface finish quality, operational throughput, and per-unit processing costs in both small-scale woodworking and high-volume manufacturing environments.
Sanding Drum Kit Components and Specifications
Core Components of Industrial Sanding Drum Kits
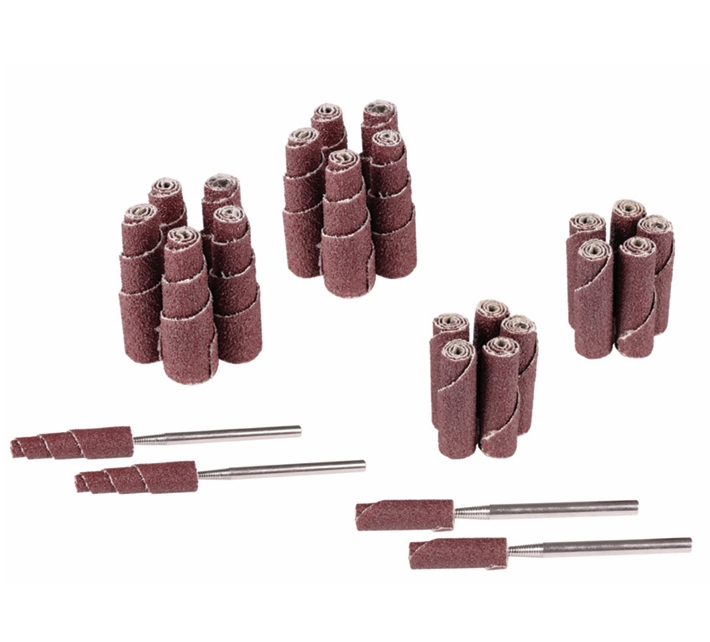
Modern sanding drum kits consist of three critical elements: the mandrel (arbor shaft), replaceable abrasive sleeves, and mounting hardware. Mandrels typically feature threaded or expansion-based locking mechanisms. Threaded mandrels (1/4″, 3/8″, or 1/2″ shank diameters) offer universal compatibility with handheld drills and drill presses, while expansion mandrels use internal rubber drums that expand when tightened, providing superior grip for high-torque applications. The mandrel material—commonly hardened steel or aircraft-grade aluminum—determines vibration dampening and heat transfer efficiency.
Abrasive sleeves utilize either cloth or paper backing. Cloth-backed sleeves (X-weight or J-weight) deliver 40-60% longer service life in industrial settings due to superior tear resistance, making them cost-effective for production environments despite 20-30% higher initial costs. Paper-backed sleeves remain economical for light-duty finishing where frequent grit changes are required. The sleeve’s internal diameter must match the mandrel’s expanded dimension with a 0.5mm tolerance to prevent slippage at operational speeds.
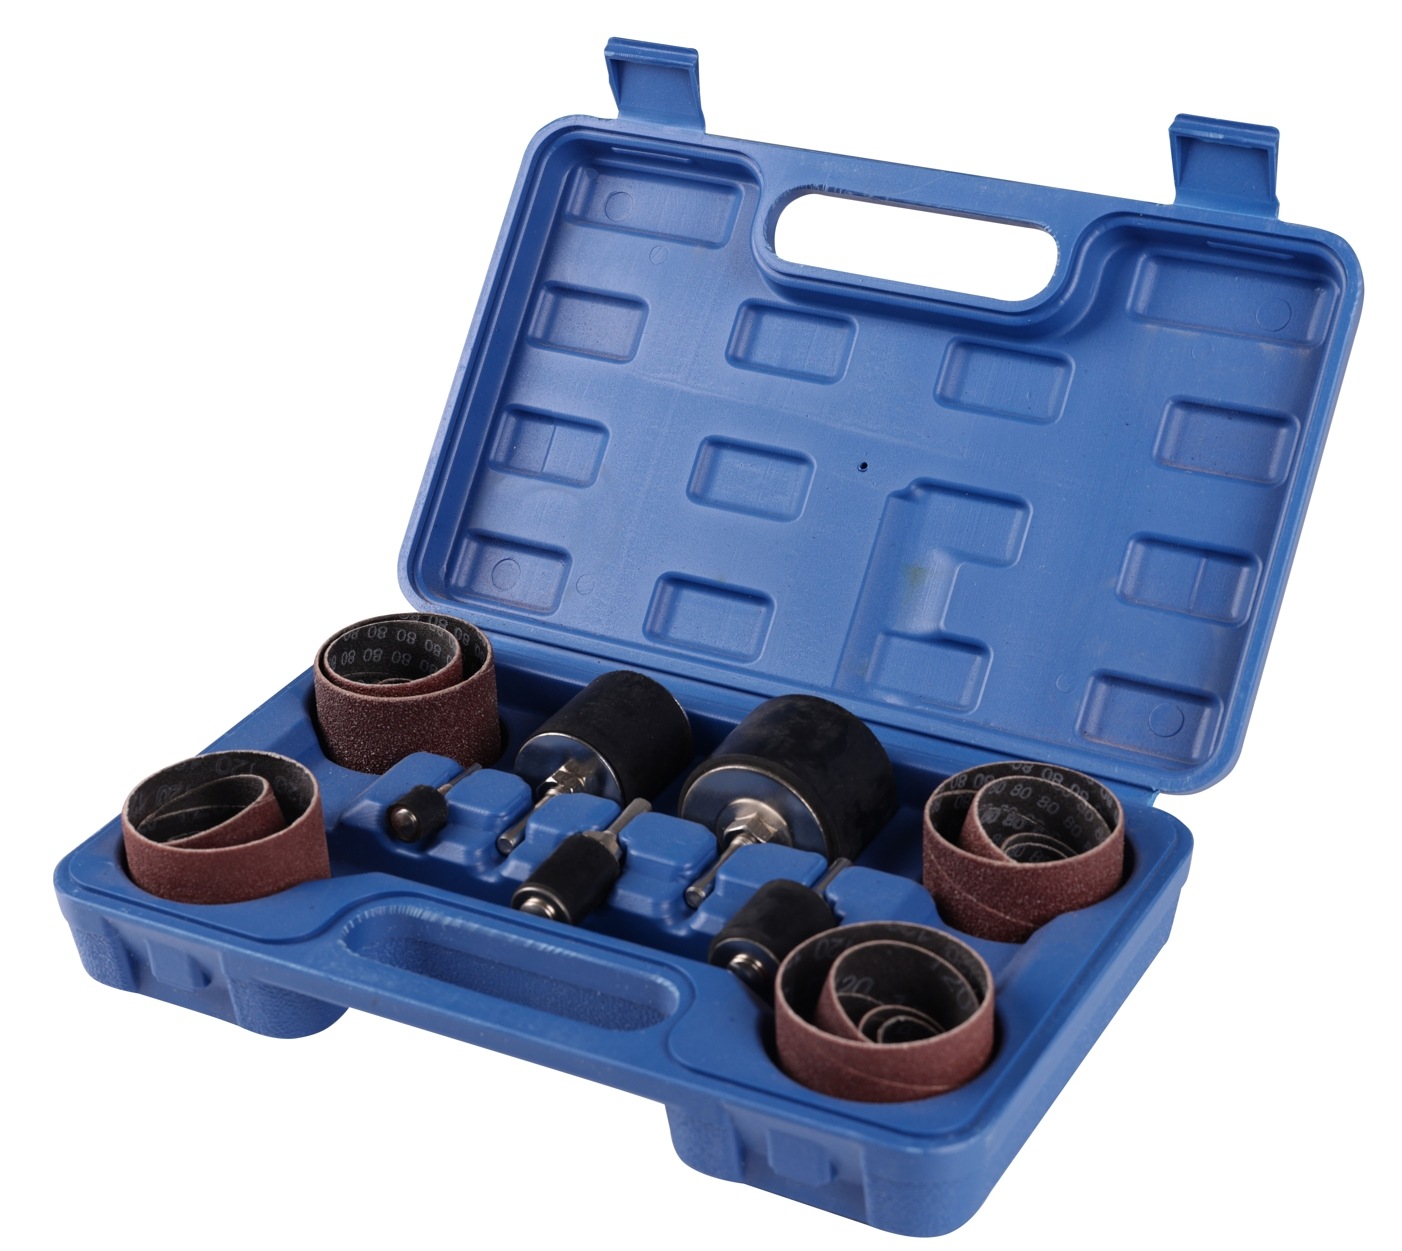
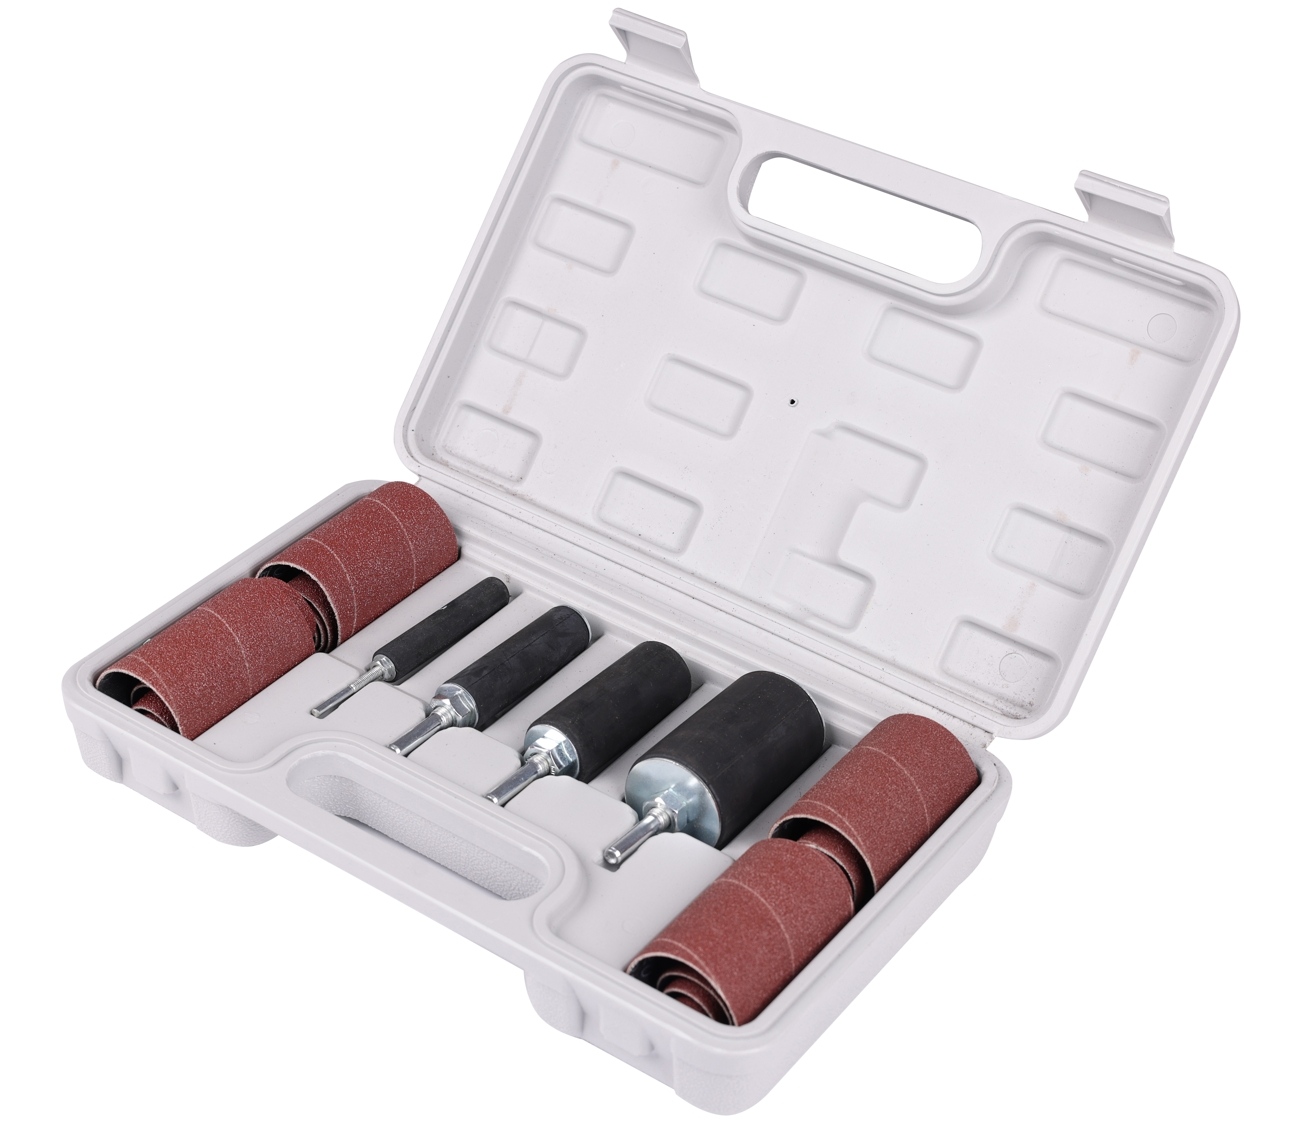
Arbor compatibility follows ANSI B94.11M standards for power tool spindles. Verify that kit shanks match your equipment’s collet or chuck capacity—mismatched diameters cause runout (eccentric rotation) exceeding 0.05mm, resulting in uneven material removal and premature abrasive wear. Premium kits include multiple mandrel sizes (typically 1/2″, 3/4″, 1″, 1.5″, 2″ drums) with quick-change systems reducing setup time by 70% compared to threaded designs.
Critical Technical Parameters
Grit range selection follows FEPA (Federation of European Producers of Abrasives) or CAMI (Coated Abrasive Manufacturers Institute) standards. Industrial kits typically span 36-320 grit:
- 36-60 grit: Aggressive stock removal (0.5-1.5mm per pass on softwoods)
- 80-120 grit: Intermediate smoothing and shaping operations
- 150-220 grit: Pre-finish surface preparation (Ra 1.6-3.2μm surface roughness)
- 240-320 grit: Final finishing for stain-ready surfaces (Ra <1.6μm)
Drum diameter-to-length ratios affect surface contact area and heat buildup. A 1:2 ratio (e.g., 25mm diameter × 50mm length) provides optimal balance for curved work, while 1:3 ratios suit flat surface processing. Larger drums (50mm+ diameter) reduce curvature marks on inside curves but require proportionally higher torque—typically 1.2-1.8 Nm for 50mm drums versus 0.4-0.6 Nm for 19mm drums.
RPM limitations are material-dependent. Softwoods tolerate 2,000-2,500 RPM with minimal burning, while hardwoods require 1,200-1,800 RPM to prevent glazing (abrasive particle polishing that reduces cutting efficiency). The formula for optimal surface speed is: V = π × D × RPM / 1000 (where V = m/s, D = drum diameter in mm). Target 15-20 m/s for wood, 10-12 m/s for non-ferrous metals. Exceeding these speeds by 30% increases the sleeve wear rate by 200-250%.

Material-Specific Selection Criteria
Hardwood vs. Softwood Applications
Hardwood processing (oak, maple, walnut with Janka hardness >1,000) demands closed-coat abrasives where grains cover 90-100% of the backing. This configuration prevents loading (resin accumulation in abrasive gaps), which reduces cutting efficiency by 60% after 5-8 minutes of continuous use. Start with 60-80 grit for dimensioning, progress to 120 grit for smoothing, then 180-220 grit for finish preparation. Each grit stage should remove scratches from the previous stage—skipping grits (e.g., jumping from 80 to 180) leaves visible cross-grain marks requiring 40% additional finishing time.
Softwood applications (pine, cedar, fir with Janka <600) benefit from open-coat abrasives (50-70% grain coverage) that provide chip clearance, crucial when processing resinous species. Use stearate-coated sleeves to minimize pitch buildup—these specialty coatings extend operational time between cleanings from 12-15 minutes to 35-45 minutes. For softwoods, 80-grit initial passes followed by 150-grit finishing typically suffice, as finer grits burnish soft fibers rather than cutting them.
Heat dissipation requirements differ significantly: hardwoods generate 40-60°C surface temperatures during aggressive sanding, while softwoods with higher resin content reach 70-90°C. Aluminum oxide abrasives maintain cutting performance to 150°C, but paper backings degrade above 80°C. For extended hardwood operations, specify cloth-backed sleeves with resin-over-resin bonding systems rated to 120°C continuous use.
Grain direction impact: Sanding parallel to grain with drum rotation perpendicular to wood fibers reduces tear-out by 85% compared to cross-grain approaches. For curved work where grain direction varies, use 120-grit or finer to minimize visible scratches—coarser grits create 0.3-0.5mm deep scratches that telegraph through stains and clear finishes.
Metal and Composite Material Considerations
Aluminum oxide abrasives (Al₂O₃) suit non-ferrous metals (aluminum, brass, copper) and composites due to their friable nature—grains fracture under pressure, exposing fresh cutting edges. For aluminum deburring, 120-180 grit removes machining marks while maintaining dimensional tolerances within ±0.1mm. Zirconia alumina (ZrO₂-Al₂O₃) provides 3-4× longer life on stainless steel and titanium alloys due to self-sharpening characteristics under high-pressure applications.
Coolant compatibility becomes critical for metal finishing. Water-based coolants require waterproof resin bonds—phenolic or polyester systems that maintain integrity when saturated. Dry sanding aluminum generates fine particulates (10-50μm) requiring dust extraction systems moving 800-1,200 CFM to prevent respiratory hazards and combustion risks (aluminum dust has a 40 mJ minimum ignition energy).
Surface finish targets for metals:
- Ra 3.2-6.3μm: 80-120 grit for weld blending and rust removal
- Ra 1.6-3.2μm: 180-240 grit for pre-paint preparation
- Ra 0.8-1.6μm: 320-400 grit for polishing visible surfaces
Composite materials (fiberglass, carbon fiber) require silicon carbide (SiC) abrasives—the hardest conventional abrasive (9.5 Mohs) that cuts resin matrices without fiber pullout. Use 80-150 grit with vacuum extraction to capture hazardous fibers.
| Material Type | Recommended Grit Range | Drum Diameter | Typical Applications |
|---|---|---|---|
| Softwood (Pine, Cedar) | 80-150 | 19-38mm | Furniture components, trim work |
| Hardwood (Oak, Maple) | 60-220 | 25-50mm | Cabinetry, flooring, architectural millwork |
| Aluminum/Brass | 120-240 | 13-25mm | Deburring, surface preparation |
| Stainless Steel | 80-180 (Zirconia) | 19-32mm | Weld finishing, corrosion removal |
| Fiberglass Composites | 80-150 (SiC) | 25-38mm | Boat repair, automotive bodywork |
Matching Drum Size to Tool and Project Scale
Power Tool Compatibility Standards
Drill press applications accommodate larger drum diameters (up to 75mm) due to rigid spindle support and variable speed control. Match drum length to drill press throat depth—a 300mm throat depth allows comfortable maneuvering of 150mm-long workpieces with 50mm drums. Verify that your drill press delivers adequate torque: 50mm drums require a minimum 0.75 HP motor at 1,500 RPM, while 25mm drums operate effectively with a 0.33 HP motor. Underpowered tools cause motor stalling and inconsistent surface finishes.
Oscillating spindle sanders provide 30-60 oscillations per minute (OPM) combined with rotation, reducing heat buildup by 40% compared to rotary-only motion. These specialized tools accept drums from 13mm to 100mm in diameter with dedicated table inserts. The oscillating action extends sleeve life by 50-80% because abrasive contact is distributed across the sleeve height rather than wearing a single band. For production environments processing 50+ pieces daily, oscillating spindle sanders reduce sleeve replacement frequency from every 3-4 hours to 6-8 hours.
Handheld drill compatibility limits drum diameter to 32mm maximum due to torque reaction and operator control constraints. Use 3/8″ or 1/2″ drill chucks with a minimum 7-amp motor (500W) for 25mm drums. Cordless drills rated below 18V struggle to maintain consistent RPM under load, causing uneven sanding patterns. For field work or portable applications, specify kits with 1/4″ shank mandrels compatible with quick-change hex adapters, reducing bit changes from 45 seconds to 8 seconds.
Chuck capacity constraints: Standard Jacobs-type chucks grip 1/2″ shanks with 1,200-1,500N clamping force, adequate for drums up to 38mm diameter. Larger drums require dedicated spindle tapers (Morse taper #2 or #3) to handle lateral loads exceeding 150N during aggressive stock removal.
Project Volume and Production Efficiency
Sleeve replacement frequency directly impacts operational costs. In production environments, track cost per square meter rather than sleeve purchase price. A premium cloth-backed sleeve costing $4.50 that processes 12m² outperforms a $2.80 paper sleeve processing 5m²—delivering $0.375/m² versus $0.56/m² operational costs.
Batch processing considerations: For runs exceeding 100 pieces, invest in kits with 10-12 sleeve assortments spanning 60-220 grit. This eliminates mid-run procurement delays that cost $85-120 per hour in labor downtime. Implement grit progression staging: dedicate specific drums to each grit level rather than changing sleeves on a single mandrel, reducing changeover time from 3-4 minutes to 15-20 seconds.
Cost-per-square-foot analysis for common scenarios:
- Small workshop (10-15 hours/week): 5-piece starter kits with paper sleeves = $0.08-0.12/sq ft
- Professional shop (40+ hours/week): 12-piece cloth-backed kits = $0.05-0.07/sq ft
- Industrial production (continuous operation): Bulk sleeve purchases (50-100 units) = $0.03-0.04/sq ft
Calculate break-even volume: If cloth sleeves cost 60% more but last 3× longer, break-even occurs at 18-20 hours monthly usage. Below this threshold, paper sleeves remain economical; above it, cloth sleeves reduce the total cost of ownership by 35-45%.
Quality Standards and Procurement Best Practices
Compliance and Safety Certifications
ANSI B7.1 standards govern portable abrasive tools, specifying maximum operating speeds and burst safety factors. Verify that drum assemblies are rated for 1.5× your tool’s maximum RPM—a 3,000 RPM drill requires drums certified to 4,500 RPM. Non-compliant products risk catastrophic failure where centrifugal forces exceed bonding strength, projecting abrasive fragments at 40-60 m/s.
OSA (Occupational Safety and Health Administration) requirements mandate that abrasive operations maintain respirable dust levels below 5 mg/m³ for wood dust, 0.5 mg/m³ for hardwood dusts (recognized carcinogens). This necessitates dust collection systems or wet sanding protocols. Specify kits compatible with vacuum shrouds, reducing airborne particulates by 92-96%.
Abrasive grain bonding quality determines performance consistency. Premium manufacturers use make coat (initial adhesive layer) and size coat (topcoat) resin systems with 12-18 hour cure cycles, achieving 8-12 N/mm bond strength. Economy products with 2-4 hour cure cycles exhibit 4-6 N/mm strength, resulting in premature grain shedding that reduces effective grit by 1-2 grades after 15-20 minutes of use.
Inspect for electrostatic grain orientation—a manufacturing process that aligns abrasive particles perpendicular to the backing for 25-30% improved cutting efficiency. Hold sleeves to light; uniform grain density without bald spots indicates quality control. Reject sleeves with visible adhesive bleed-through (indicating excess bonding resin that causes loading) or loose grains (indicating insufficient bonding).
Supplier Evaluation Criteria
Sleeve consistency testing: Request samples from different production lots. Measure sleeve internal diameter with calipers—variance exceeding ±0.3mm indicates inadequate quality control. Premium suppliers maintain ±0.15mm tolerances, ensuring consistent mandrel fit across 500-1,000 sleeve batches.
Bulk pricing structures typically offer:
- 10-24 sleeves: 15-20% discount
- 25-49 sleeves: 25-30% discount
- 50+ sleeves: 35-45% discount plus freight inclusion
Negotiate consignment inventory agreements for high-volume users: suppliers stock 3-6 months inventory on-site, billing only upon usage. This reduces working capital requirements by $2,000-5,000 for shops consuming 200+ sleeves annually.
Technical support availability differentiates professional suppliers. Prioritize vendors offering:
- Application engineering consultations (optimizing grit sequences for specific materials)
- Failure analysis services (identifying root causes of premature wear)
- Custom kit configuration (assembling project-specific assortments)
Verify lead times and minimum order quantities (MOQ). Domestic suppliers typically ship within 48-72 hours with 5-10 piece MOQs, while offshore sources require 4-6 weeks with 50-100 piece MOQs. For just-in-time operations, domestic sourcing’s 25-35% price premium is offset by inventory carrying cost reductions.
FAQ
1. What grit sequence should I use for furniture refinishing projects?
For solid hardwood furniture refinishing, begin with 80-grit to remove old finishes and level uneven surfaces (expect 0.3-0.5mm material removal). Progress to 120-grit for intermediate smoothing, then 180-grit for pre-stain preparation. If applying film-building finishes (polyurethane, lacquer), stop at 180-grit—finer grits burnish wood fibers, reducing finish adhesion by 20-30%. For oil finishes, extend to 220-grit for optimal penetration. Each grit stage should involve 2-3 passes with 50% overlap, maintaining 15-20° drum angle to the surface. Total processing time: 8-12 minutes per square foot for three-grit progression.
2. How do I calculate the optimal drum diameter for curved surfaces?
The drum diameter should be 30-40% smaller than the tightest curve radius to prevent flat spots. For inside curves (concave surfaces like chair spindles), use this formula: Drum Diameter ≤ 0.35 × Curve Radius. Example: a 50mm radius curve requires a ≤17.5mm drum diameter. For outside curves (convex surfaces), drums can be 50-60% of the radius without visible faceting. Smaller drums (13-19mm) suit tight radii (30-50mm) but require frequent sleeve changes due to limited abrasive surface area. Larger drums (38-50mm) efficiently process gentle curves (100mm+ radius) with 60% faster material removal rates. When working with complex curves with varying radii, maintain a kit with 19mm, 25mm, and 38mm drums to optimize each section.
3. Can sanding drum kits be used with CNC routers or automated systems?
Yes, with specific adaptations. CNC integration requires ER collet-compatible mandrels (typically ER16 or ER20 sizes) with balanced runout <0.02mm at 18,000-24,000 RPM—significantly tighter than manual tool standards. Program spindle speeds 40-50% lower than manufacturer ratings to prevent heat buildup in automated continuous-duty cycles. Use closed-loop dust extraction with 1,200+ CFM capacity to prevent abrasive dust contamination of linear guides and ball screws. Implement tool life monitoring: track square footage processed per sleeve and program automatic tool change routines when approaching 85% of expected life (typically 8-10m² for cloth sleeves in hardwood). Robotic applications benefit from quick-change mandrel systems, reducing changeover from 90 seconds (manual) to 6-8 seconds (pneumatic tool changers), critical for lights-out manufacturing operations.
Choosing the right sanding drum kit depends on balancing material hardness, project scale, and tool compatibility. Prioritize grit progression planning—each stage should remove previous scratches while advancing surface quality toward your finish target. Verify dimensional compatibility with existing equipment, particularly mandrel shank diameter and drum size constraints relative to your power tool’s torque capacity and chuck specifications. Evaluate total cost of ownership, including sleeve replacement cycles: cloth-backed sleeves deliver 35-45% lower operational costs in production environments despite higher initial investment, while paper sleeves remain economical for intermittent use below 18-20 hours monthly.
For high-volume industrial applications, specify kits with standardized arbor systems (1/2″ shanks for drill presses, ER collets for CNC integration) and certified abrasive quality meeting ANSI B7.1 standards. Implement supplier qualification protocols verifying sleeve dimensional consistency (±0.15mm tolerance), grain bonding integrity (8-12 N/mm strength), and technical support capabilities. Strategic procurement—including bulk pricing negotiations and consignment inventory agreements—reduces abrasive costs by 30-40% while ensuring operational continuity through optimized stock levels and reliable lead times.